

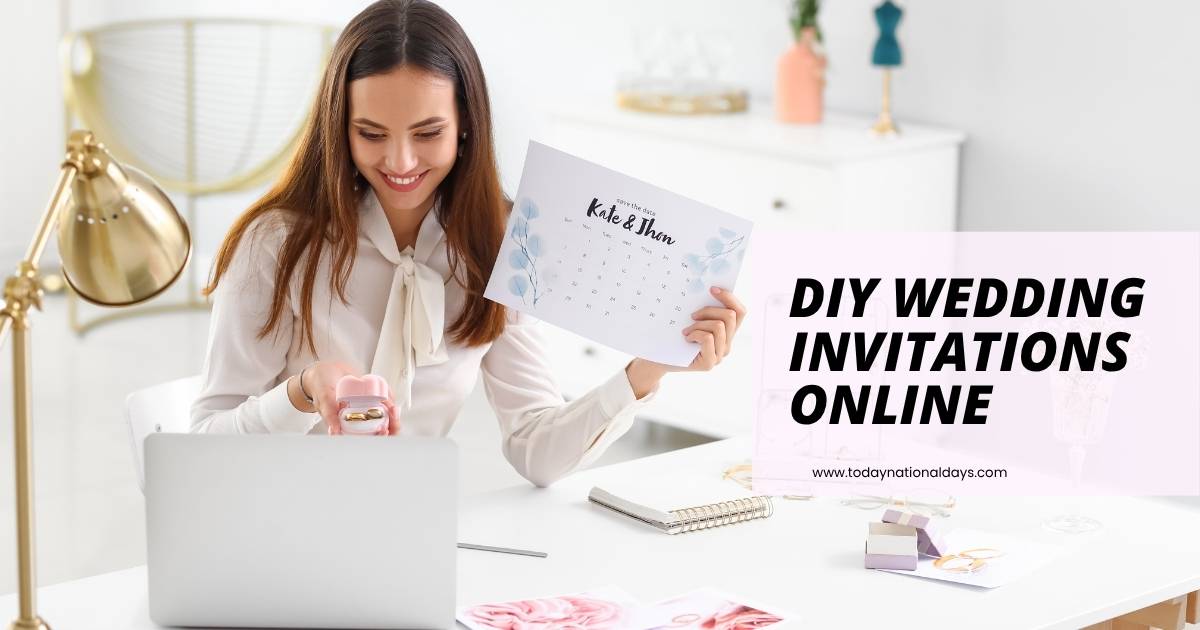
Creating DIY wedding invitations online is a popular choice for couples who want a meaningful and cost-effective way to personalize their big day. With easy-to-use platforms and creative design tools now widely available in countries like the USA, UK, Canada, and Australia, it’s easier than ever to make invitations that reflect your style, match your theme, and stay within your budget. This guide offers a complete, step-by-step breakdown designed for engaged couples looking to craft wedding stationery that feels thoughtful, professional, and unique.
Whether you’re planning a rustic outdoor ceremony or a classic ballroom reception, this article answers every major question couples search for: how to start designing, where to find templates, which materials work best, and how to avoid common printing mistakes. If you’re searching for a hands-on way to make your wedding feel more personal while keeping costs low, this DIY wedding invitation guide provides clear solutions and creative ideas you won’t want to miss.
Why DIY Invitations Make Sense
DIY invites serve a twofold purpose: they elevate your wedding’s personal touch and can significantly reduce costs. A Bride’s magazine guide recommends harnessing sites like Canva, Minted, or Etsy for professional-looking templates that you customize and print—home or via print shops—to suit your style and budget.
Designing With Intention
Begin with the look of your wedding. Is it rustic barn? Elegant ballroom? Choose fonts, color palettes, and elements that echo your event vibe. For example, one expert notes incorporating watercolor florals or custom textures, which give invites an artisanal feel .
Step‑by‑Step Guide to Creating Your Own Invites
Define Your Vision and Set a Budget
- Write down style words: modern, minimalist, boho, etc.
- Decide how much you’re willing to spend—consider if you’re printing at home or ordering online.
- Realize that extras like envelopes, liners, wax seals, or belly bands can add costs.
Choose Your Design Platform
- Canva: Free drag‑and‑drop tool with DIY templates, fonts, and images.
- Minted/Paper Source: Semi-custom solutions that offer pro guidance.
- Etsy/Creative Market: Purchase design files and tweak them to suit your taste.
Select Paper and Printing Methods
- For home printing, test your printer’s limits on cardstock thickness and use borderless options if needed.
- Printable templates often default to A7 (5×7″), but verifying sizing avoids postage issues.
- Professional print shops or online providers can ensure consistent quality, especially for edge-to-edge prints (bleeds).
Add Finishing Touches
- Embellishments like wax seals, vellum overlays, ribbons, belly bands, and die-cut tags amplify elegance.
- Keep weight and envelope thickness in check for postage. Consider hand-cancelling for bulky kits.
Assemble, Mail, and Track
- Mail invites 6–8 weeks ahead to allow timely RSVP collection.
- Weigh one full invite at the post office to calculate correct postage before mailing the full batch.
Cost‑Saving Hacks and Time‑Saving Tips

- Mix Print & Digital Invites
Digital RSVP systems like Joy, Poply, and Paperless Post offer stylish, cost-effective solutions. They allow for elegant email or SMS invites and combine traditional cards for distant guests. - Use Cashback & Bulk Options
Canva lets you lay out two 5×7 cards per 8.5×11 page as PNGs, then upload to FedEx or print service for just $0.26–$0.30 per invite . - Save On Inserts
Skip RSVP cards and direct guests to a wedding RSVP website instead. This saves paper, printing, and postage costs. - Choose Semi-DIY Kits
Complete kits (e.g., Cards & Pockets) include cardstock, envelopes, templates, and assembly supplies — more convenient and still budget-friendly.
Sample DIY Process Table
| Phase | Tools/Platform | Key Tasks | Cost Tip |
|---|---|---|---|
| 1. Plan + Budget | Document/Spreadsheet | List style words, materials, timeline, budget | Set max per invite before extras |
| 2. Design | Canva, Minted, Etsy | Choose fonts, add imagery, set layout | Use free elements to reduce cost |
| 3. Proof + Print | Home printer or print shop | Test print, adjust sizes, ensure bleeds | Print a few test copies first |
| 4. Embellish | Wax seals, vellum, ribbons | Layer components, add detail elements | Prioritize one standout feature |
| 5. Mail Prep | Post office + RSVP site | Weigh invite, calculate postage, launch RSVP site | Direct RSVP online to save inserts/post |
Craft and Assembly Ideas with DIY Flair
- Floral & Watercolor
One crafters used watercolor floral prints and layered them over chipboard, embellished with lace and metallic leafing. - Belly Band Kits
Create your own band using cardstock strips and decorative die-cuts to wrap around invite + RSVP bundle. - DIY Envelope Liners
Add a liner sourced from scrapbooking paper to match your invite aesthetic. These are easy inserts that elevate the unboxing moment. - Fake Wax Seals
Glitter or imitation wax seals require no heat, but offer the same vintage charm — Pinterest is full of tutorials. - Calligraphy Accents
Even a subtle handwritten element (like names or addresses) gives a luxe feel—pair with modern fonts for contrast.
Pro‑Level Digital Invitation Strategies
- Invite Platforms & Management
Joy (free) and Poply (with premium option) offer RSVP tracking, email/sms sends, and registry links. - Hybrid Suites
Send a printed invite as keepsake, then follow up with a QR code linking to digital site or RSVP form—blends tradition with convenience. - Design Sync with Wedding Website
Use services like The Knot or Paperless Post so your digital invite mirrors your print invite design—stylistic consistency matters - Combat RSVP Fatigue
Digital invites can help reduce ghosting by sending timely reminders and easy RSVP links—yet be mindful users might prefer traditional formats.
DIY vs Semi‑Custom vs Digital – Choosing the Right Route
| Method | Best For | Investment | Personal Touch |
|---|---|---|---|
| Fully DIY | Craft‑savvy couples with time and equipment | Low–Moderate | High |
| Semi‑Custom Kits | Limited crafting but want control | Moderate | Moderate |
| Online Platforms | Minimal effort, convenience, and RSVP tracking | Moderate–High | Moderate |
| Digital Invites | Tech-friendly couples wanting cost-efficiency & speed | Low–Moderate | Low–Medium |
- If you love crafts and time, fully DIY gives maximum customization.
- Kits pair convenience with a handcrafted feel.
- Online platforms offer sleek designs and RSVP management.
- Digital invites boost budget and speed, but may lack physical charm.
Usual Mistakes to Avoid When Making DIY Wedding Invitations Online
Even the most thoughtful DIY wedding invitations can hit snags without proper planning. Here are common pitfalls that you can sidestep:
- Skipping the Proofing Step
Many couples forget to proofread. Spelling errors, incorrect dates, or venue typos can lead to embarrassment or miscommunication. Always double-check, and if possible, have someone else review before printing. - Not Testing Print Settings
Home printers vary widely in output quality. Failing to test how cardstock loads, whether ink bleeds, or how colors appear may result in wasted paper and poor presentation. Always print a sample. - Forgetting Postage Calculations
DIY invites often include extras—ribbons, belly bands, liners—which increase weight and thickness. This can push postage beyond standard letter rates. Visit the post office with one assembled sample before stamping all. - Overloading with Too Many Fonts or Elements
Overdesigning with five fonts or cluttering invites with too many images can reduce legibility. Stick to 2–3 font types and allow white space for a clean, polished look. - Ignoring Print Alignment and Bleed Areas
If your design touches the edge, you’ll need to extend bleed margins. Otherwise, trimming may cut into your text or graphics.
Avoiding these missteps not only saves money but also protects the time and effort you invest in your invitations.
Top DIY Invitation Themes That Never Go Out of Style
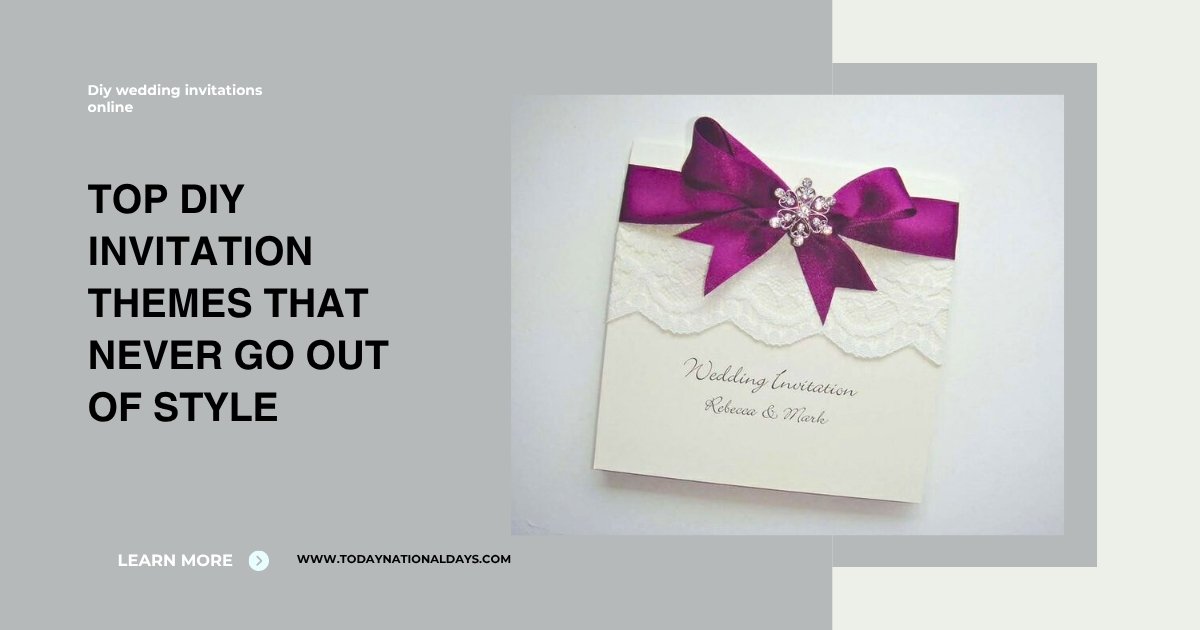
Themed wedding invitations help set the tone for your big day. These timeless DIY concepts blend personal touch with universal appeal:
- Rustic Elegance
Think kraft paper, lace accents, mason jar illustrations, and woodgrain backgrounds. Works perfectly for barn weddings or countryside venues. - Modern Minimalist
Clean lines, sans-serif fonts, and monochrome or neutral palettes. Minimalist designs highlight text and white space, offering a sleek look. - Vintage Romance
Use soft pastels, hand-drawn florals, and script fonts to evoke old-world charm. Wax seals and deckled edges give extra character. - Boho Chic
Dried florals, watercolor splashes, macramé textures, and earthy tones. Great for beach weddings or backyard celebrations. - Destination Ready
Boarding-pass invites, map-themed inserts, or passport-style booklets are ideal for weddings abroad. Pair with themed stamps or twine.
When choosing a theme, let it reflect both your venue and personalities. A well-aligned design builds anticipation and offers guests a sneak peek into your celebration style.
Conclusion: Diy Wedding Invitations Online
DIY wedding invitations online are more than just stationery—they tell your story and set the tone for your wedding. By balancing creativity, cost, and convenience, you can craft invitations that guests will admire and cherish.
From choosing the right platform (Canva/Etsy), testing paper, opting for embellishments, and choosing between printed vs digital, this guide covers all bases. Your invites, whether fully handmade or partly digital, will deliver a polished, meaningful first impression. Happy crafting—and here’s to invites that feel just right for your big day!